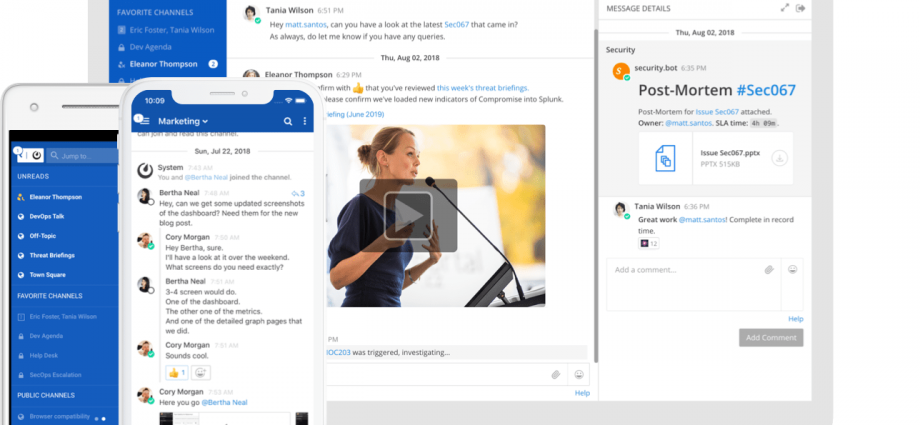
This will show you how to install a Self-hosted team communication/ chat platform that supports video/ voice calls for free. Mattermost is built using new modern technologies like Go programming language, ReactJS, and uses MySQL or PostgreSQL.
Features include: channels, private messaging, inline-media, full-text-search for messages, multi-languages support, files/ images sharing, Push notification, desktop notification.
Multiple deployment/ setup options with multi-platforms clients support as MacOSX, Windows, and Linux alongside with mobile apps for iOS/ Android.
This project is quite similar to RocketChat in many aspects including developer tools, bot development and webhooks, the different in here is the stack used for development. However, Mattermost provides a successful use-case for multiple sectors like financial, healthcare, government, security and DevOps sectors.

Server Software
Mattermost Server Operating System
- Ubuntu 16.04, Ubuntu 18.04, Debian Buster, CentOS 6+, CentOS 7+, RedHat Enterprise Linux 6+, RedHat Enterprise Linux 7+, Oracle Linux 6+, Oracle Linux 7+
- Using the Mattermost Docker image on a Docker-compatible operating system (Linux-based OS) is still recommended
Database Software
- MySQL 5.6, 5.7, 8 (see note below on MySQL 8 support)
- PostgreSQL 9.4+
- Amazon Aurora MySQL 5.6+
Hardware Requirements for Team Deployments
Most small to medium Mattermost team deployments can be supported on a single server with the following specifications based on registered users:
- 1 – 1,000 users – 1 vCPU/cores, 2 GB RAM
- 1,000 – 2,000 users – 2 vCPUs/cores, 4 GB RAM
Estimated storage per user per month
File usage per user varies significantly across industries. The below benchmarks are recommended:
- Low usage teams (1-5 MB/user/month)
- Primarily use text-messages and links to communicate. Examples would include software development teams that heavily use web-based document creation and management tools, and therefore rarely upload files to the server.
- Medium usage teams (5-25 MB/user/month)
- Use a mix of text-messages as well as shared documents and images to communicate. Examples might include business teams that may commonly drag and drop screenshots, PDFs and Microsoft Office documents into Mattermost for sharing and review.
- High usage teams – (25-100 MB/user/month)
- Heaviest utlization comes from teams uploading a high number of large files into Mattermost on a regular basis. Examples include creative teams who share and store artwork and media with tags and commentary in a pipeline production process.
Example: A 30-person team with medium usage (5-25 MB/user/month) with a safety factor of 2x would require between 3.5 GB (30 users * 5 MB * 12 months * 2x safety factor) and 17.6 GB (30 users * 25 MB * 12 months * 2x safety factor) of free space in the next year
Step 1: Install MariaDB Database Server
sudo apt update sudo apt-get install mariadb-server mariadb-client
After installing MariaDB, the commands below can be used to stop, start and enable MariaDB service to always start up when the server boots..
Run these on Ubuntu 16.04 LTS
sudo systemctl stop mysql.service
sudo systemctl start mysql.service
sudo systemctl enable mysql.service
Run these on Ubuntu 17.10 and 18.04 LTS
sudo systemctl stop mariadb.service
sudo systemctl start mariadb.service
sudo systemctl enable mariadb.service

After that, run the commands below to secure MariaDB server by creating a root password and disallowing remote root access.
sudo mysql_secure_installation
When prompted, answer the questions below by following the guide.
- Enter current password for root (enter for none): Just press the Enter
- Set root password? [Y/n]: Y
- New password: Enter password
- Re-enter new password: Repeat password
- Remove anonymous users? [Y/n]: Y
- Disallow root login remotely? [Y/n]: Y
- Remove test database and access to it? [Y/n]: Y
- Reload privilege tables now? [Y/n]: Y
Restart MariaDB server
sudo systemctl restart mariadb.service
After installing MariaDB server, continue below to create Mattermost database and datbase user account…
Now that you’ve install all the packages that are required, continue below to start configuring the servers. First run the commands below to create a blank Mattermost database.
Run the commands below to logon to the database server. When prompted for a password, type the root password you created above.
sudo mysql -u root -p
Then create a database called mattermost
CREATE DATABASE mattermost;
Create a database user called mattermostuser with new password
CREATE USER 'mattermostuser'@'localhost' IDENTIFIED BY 'new_password_here';
Then grant the user full access to the database.
GRANT ALL ON mattermost.* TO 'mattermostuser'@'localhost' IDENTIFIED BY 'user_password_here' WITH GRANT OPTION;
Finally, save your changes and exit.
FLUSH PRIVILEGES;
EXIT;
Step 2: Download and Configure Mattermost Server
After setting up Mattermost, run the commands below to download Mattermost server archive…
cd /tmp && wget https://releases.mattermost.com/5.0.1/mattermost-5.0.1-linux-amd64.tar.gz
After downloading the archive, run the commands below to extract it… and move it to the /opt directory…
tar -xvzf mattermost*.gz sudo mv mattermost /opt
Next, create a storage directory for files..
sudo mkdir /opt/mattermost/data
The storage directory will contain all the files and images that your users post to Mattermost, so you need to make sure that the drive is large enough to hold the anticipated number of uploaded files and images.
Next, set up a system user and group called mattermost that will run this service, and set the ownership and permissions. Create the Mattermost user and group by running the commands below:
sudo useradd --system --user-group mattermost
Set the user and group mattermost as the owner of the Mattermost files:
sudo chown -R mattermost:mattermost /opt/mattermost
Give write permissions to the mattermost group:
sudo chmod -R g+w /opt/mattermost
After that, run the commands below to edit Mattermost database connection info….
sudo nano /opt/mattermost/config/config.json
Then make the highlighted changes below and save the file…
You can open in nano editor
"SqlSettings": {
        "DriverName": "mysql",
        "DataSource": "mattermostuser:new_password_here@tcp(localhost:3306)/mattermost?charset=utf8mb4,utf8&readTimeout=30s&writeTimeout=$
        "DataSourceReplicas": [],
        "DataSourceSearchReplicas": [],
        "MaxIdleConns": 20,
        "MaxOpenConns": 300,
        "Trace": false,
        "AtRestEncryptKey": "",
        "QueryTimeout": 30
After that, run the commands below to create a systemd service unit file..
sudo nano /etc/systemd/system/mattermost.service
Then copy and paste the content below into the file and save…
[Unit]
Description=Mattermost
After=network.target
After=mariadb.service
Requires=mariadb.service

[Service]
Type=notify
ExecStart=/opt/mattermost/bin/mattermost
TimeoutStartSec=3600
Restart=always
RestartSec=10
WorkingDirectory=/opt/mattermost
User=mattermost
Group=mattermost
LimitNOFILE=49152

[Install]
WantedBy=mariadb.service
For Ubuntu 16.04, replease mariadb.service with mysql.service…
Next, run the commands below to start Mattermost service..
sudo systemctl daemon-reload
sudo systemctl start mattermost.service
sudo systemctl enable mattermost.service

Now open your browser and browse to the server hostname or IP address followed by port # 8065

http://your-server-ip:8065
(remember to open port in your firewall and iptables and disable selinux)

You should see Mattermost signup page…

Create an admin account and sign on…
